Hello, and welcome to an exciting day! Today, I participated in my very first Instagram hop! I feel honored and privileged to be part of the Sharing Summer Cardmaking Challenge hosted by @thatcraftygolden.
The week 1 theme, Shell-abrate Summer, posed a bit of a challenge for me because, in all my crafty stash, I have nothing that screams, or even whispers, beaches, shells, water, or tropical vibes. Nothing.
Lucky for me, what I lack in stamps and dies, I make up for in DMC floss. To pull off the theme, I turned to the Spellbinders Stitched Fanfare die and semi-patriotic, but definitely tropical, colors.
Fanfare (noun): ballyhoo, hullabaloo, panoply, and obviously, shell-abration. Yep. All synonyms. Dilemma solved. I dived right in.

Diecut Surgery:
My goal with this design was to have all the "fans" in the fanfare radiating away from the a center point instead of facing the same direction. Here, it will help to see the starting point.

I cut two of these diecuts from Neenah Classic Crest Solar White in 110#.
 |
I cut each diecut panel into two usable pieces, which left a sacrificial tiny strip in the middle of each. Notice that the "fans" on the two panels are fanning in opposite directions. |

Now, watch this sleight of hand. Discard the tiny strips, and then swap the two larger pieces. Ta-da! Now the sentiment can be placed in the empty spot and all the fans will radiate toward (the left panel) or away from (the right panel) that center point.
Stitching:
Next, I stitched up one set of diecuts using five shades of coral and three shades of peacock blue, creating an ombré effect.
Here are the colors:
- DMC 352 - Light Coral
- DMC 351 - Coral
- DMC 350 - Medium Coral
- DMC 349 - Dark Coral
- DMC 817 - Very Dark Coral Red
- DMC 3766 - Light Peacock Blue
- DMC 807 - Peacock Blue
- DMC 3765 - Very Dark Peacock Blue
Card Assembly:

To soften the background, I adhered vellum behind each diecut. It's weird. I have no idea why this makes such a difference; it just does. I adhered the coral piece to the top of an A2 top-folding notecard and then adhered the peacock piece to the bottom of that same notecard. This left a void between the two sections. Since I don't trust myself with scissors, I used my trimmer to cut out that center void.
The Key to Assembly: The Sentiment
The sentiment holds the two pieces of the front panel together, so size is everything. The sentiment needed to be large enough to span the gap and provide stability to the card. I used the Honey Bee Celebrate word die, which was an exclusive product from the Crop & Create Delivered Cardmaking event in March 2022.
I cut the largest, stitched shadow from white twice and vellum once, cut the smaller shadow from white, and cut the word detail die from Spellbinders Brushed Silver card stock. I stacked these up and positioned the diecut between the two stitched pieces, being careful to only glue where the sentiment would touch the front panel.
Finishing Touches:
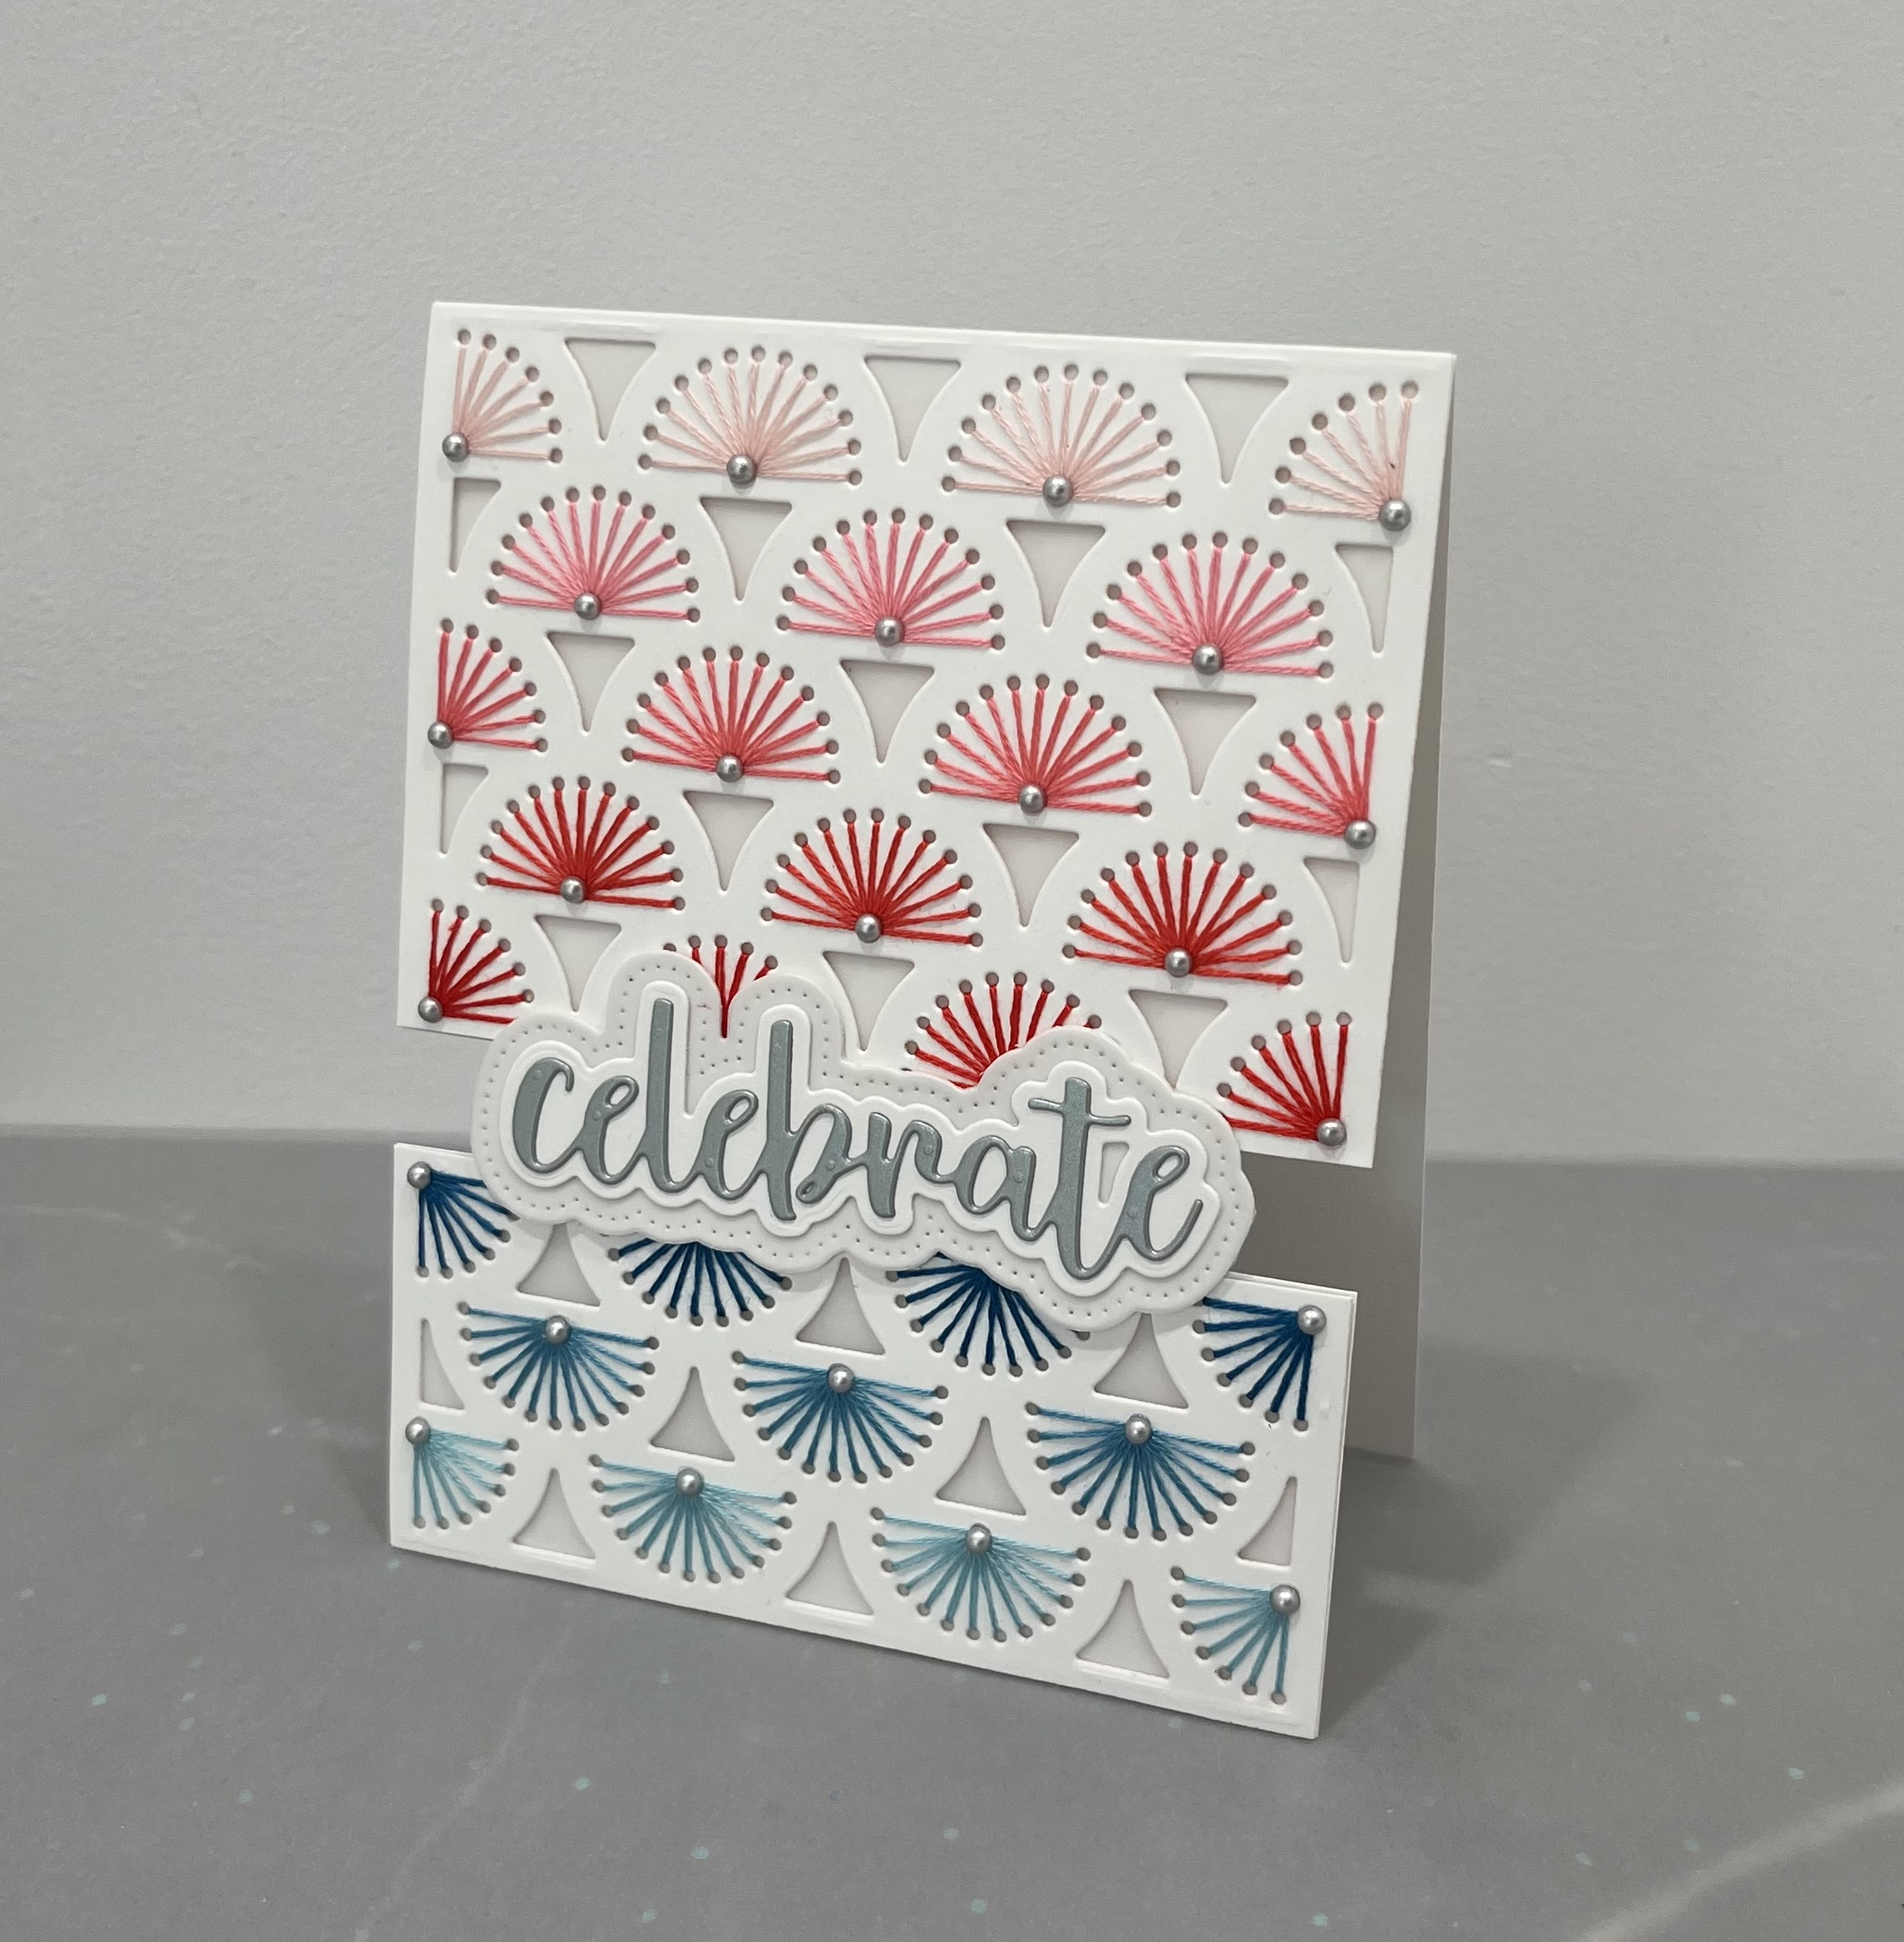
I finished the card with Pinkfresh Studio Metallic Pearls in Matte Silver.
And there you have it: my shell-abratory card for my first Instagram hop!
I hope this inspires you to look at your diecuts in creative ways. Don't be afraid to cut them up and reimagine what they can be!
Thanks for stopping by!
Tammy
Tammy
Comments
Post a Comment